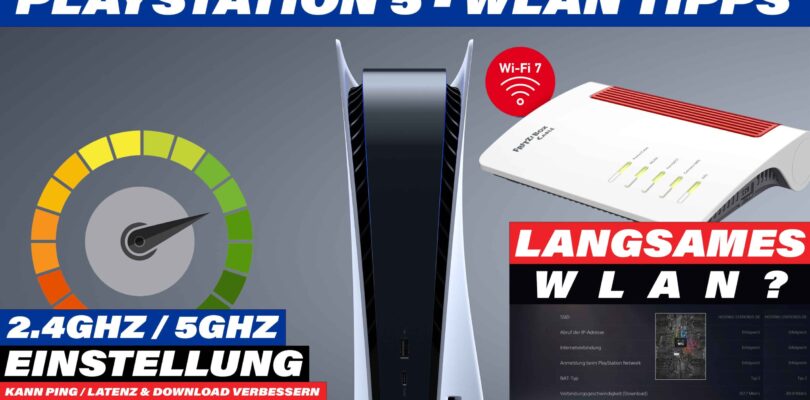
In diesem Tutorial zeige ich dir, wie du auf deiner Playstation5 Konsole die WLAN Einstellungen optimieren und deinen Download auf der PS5 beschleunigen kannst.
Wir gehen dabei Schritt für Schritt durch die Anpassung deines Netzwerks auf das leistungsfähige 5-GHz-Band durch.
Beachte bitte, dass dein WLAN Router natürlich das 5-GHz Frequenzband unterstützen muss.
Hinweis zur Playstation Konsole: Es geht übrigens mit jeder Playstation, welche über WLAN angeschlossen ist. Also nicht nur die Playstation5, sondern auch die Playstation4 und sogar die PS3.
Anpassung der WLAN-Einstellungen für die PlayStation5
Wenn du eine PlayStation 5-Konsole hast und die Leistung deines WLANs optimieren möchtest, kannst du auch die WLAN-Einstellungen auf der Konsole anpassen. Hier sind die Schritte dazu:
a. Schaltet deine PlayStation 5-Konsole ein und navigiere zum Hauptmenü.
b. Gehe zu den „Einstellungen“ und wählen dann „Netzwerk“.
c. Wählen „Internetverbindung“ aus und dann „WLAN“.
d. Hier siehst du die verfügbaren WLAN-Netzwerke. Wählen dein Netzwerk aus.
e. Falls dein WLAN beide Frequenzbänder unterstützt, wähle das 5-GHz-Band aus.
f. Geben gegebenenfalls dein WLAN-Passwort ein, um die Verbindung herzustellen.
g. Überprüfen am Schluss die Netzwerkverbindung, um sicherzustellen, dass die PlayStation 5 erfolgreich mit dem 5-GHz-Band verbunden ist und diese auch stabil läuft.
Achte besonders auf die Signalstärke, wenn diese bei 100% ist, passt alles. Ansonsten solltest du über den Einsatz des 2.4-GHz-Band nachdenken.
Überwachung der Leistung auf der PlayStation 5
Nach der Umstellung auf das 5-GHz-Band könnt Ihr die Netzwerkverbindung auf euerer PlayStation 5 überwachen. Überprüft dabei die Signalstärke und Geschwindigkeit, um sicherzustellen, dass Ihr von der höheren Bandbreite profitiert.
2,4-GHz WLAN:
- Höhere Reichweite: Das 2,4-GHz-Band bietet eine größere Reichweite im Vergleich zu 5 GHz, was bedeutet, dass das Signal besser durch Wände und Hindernisse dringen kann.
- Bessere Durchdringung von Hindernissen: Aufgrund der niedrigeren Frequenz hat das 2,4-GHz-Band eine bessere Durchdringungsfähigkeit durch Wände und andere physische Hindernisse.
- Weniger anfällig für Abschattungseffekte: In Umgebungen mit vielen Objekten, die Signale abschirmen könnten, zeigt das 2,4-GHz-Band eine bessere Leistung.
- Größere Kompatibilität mit älteren Geräten: Ältere WLAN-Geräte und einige IoT-Geräte bevorzugen das 2,4-GHz-Band, da es weit verbreitet und von vielen Geräten unterstützt wird.
- Begrenzte Bandbreite: Das 2,4-GHz-Band bietet eine begrenzte Bandbreite, die sich auf maximal 14 Kanäle verteilt.
- Höhere Störanfälligkeit: Da viele andere Geräte, wie Mikrowellen, Bluetooth-Geräte und Babyphones, das 2,4-GHz-Band nutzen, ist es anfälliger für Störungen.
5-GHz WLAN:
- Höhere Geschwindigkeit: Das 5-GHz-Band bietet höhere Geschwindigkeiten aufgrund einer größeren verfügbaren Bandbreite im Vergleich zu 2,4 GHz.
- Weniger Störanfälligkeit: Aufgrund der breiteren Kanalspreizung und weniger Nutzung durch andere Geräte ist das 5-GHz-Band weniger anfällig für Störungen.
- Bessere Leistung in dicht besiedelten Gebieten: In Gebieten mit vielen WLAN-Netzwerken kann das 5-GHz-Band eine bessere Leistung bieten, da es weniger überfüllt ist.
- Kürzere Reichweite: Das 5-GHz-Band hat im Vergleich zu 2,4 GHz eine kürzere Reichweite, da höhere Frequenzen eher von physischen Hindernissen beeinträchtigt werden.
- Bessere Unterstützung für bandbreitenintensive Anwendungen: Das 5-GHz-Band eignet sich besser für bandbreitenintensive Anwendungen wie Online-Gaming und Videostreaming.
- Mehr verfügbare Kanäle: Das 5-GHz-Band bietet mehr verfügbare Kanäle, was zu einer geringeren Wahrscheinlichkeit von Interferenzen führt. Das 5-GHz-Band hat eine Bandbreite von bis zu 1300 Mbit/s, während das 2,4-GHz-Band nur eine Bandbreite von bis zu 450 Mbit/s hat
FritzBox Tutorial
Maximale Geschwindigkeit: So aktivierst du das 5-GHz WLAN auf deiner Fritzbox!
Einleitung:
In diesem einfachen Tutorial zeigen wir dir, wie du das 5-GHz WLAN auf deiner Fritzbox aktivierst, um die maximale Geschwindigkeit für deine Internetverbindung und Geräte zu erreichen. Folge diesen Schritten, um das Beste aus deinem WLAN herauszuholen.
Schritt 1: Fritzbox-Anmeldung
- Öffne deinen Webbrowser und rufe Fritz.box oder die IP-Adresse deiner Fritzbox in die Adressleiste auf (standardmäßig „192.168.178.1“).
- Melde dich nun mit deinem Benutzernamen und Passwort an. „Das Passwort steht ggfs. auf der Rückseite der FritzBox“
Schritt 2: Navigiere zu den WLAN-Einstellungen
- Klicke auf „WLAN“ in der linken Seitenleiste.
- Wähle „Funkkanal“ aus.
Schritt 3: Auswahl des Frequenzbands
- Unter „Funkkanal“ findest du die Option „Funknetz“.
- Wähle hier das 5-GHz-Band aus.
Schritt 4: Aktiviere das 5-GHz-Band
- Klicke auf „Aktiviere das Funknetz (SSID) für das 5-GHz-Band“.
- Bestätige die Aktivierung.
Schritt 5: Einstellungen speichern
- Klicke auf „Übernehmen“, um deine Änderungen zu speichern.
- Die Fritzbox wird neu gestartet, um das 5-GHz-Band zu aktivieren.
Schritt 6: Überprüfe die Verbindung
- Warte, bis die Fritzbox neu gestartet ist.
- Verbinde deine Geräte mit dem neu aktivierten 5-GHz-WLAN.
Schritt 7: Überwache die Netzwerkgeschwindigkeit
- Überprüfe die Netzwerkgeschwindigkeit deiner Geräte, um sicherzustellen, dass sie jetzt das 5-GHz-Band nutzen.
PS5 WLAN Tutorial in Englisch
In this tutorial, I’ll show you how to optimize the Wi-Fi settings on your PlayStation 5 console and accelerate downloads on your PS5.
We’ll go through the process step by step to adjust your network to the powerful 5 GHz band.
Please note that your Wi-Fi router must, of course, support the 5 GHz frequency band.
Note about the PlayStation console: By the way, this works with any PlayStation that is connected via Wi-Fi. So not only the PlayStation 5 but also the PlayStation 4 and even the PS3.
Adjusting Wi-Fi Settings for PlayStation 5
If you have a PlayStation 5 console and want to optimize your Wi-Fi performance, you can also adjust the Wi-Fi settings on the console. Here are the steps:
a. Turn on your PlayStation 5 console and navigate to the main menu.
b. Go to „Settings“ and then select „Network.“
c. Choose „Internet Connection“ and then „Wi-Fi.“
d. Here, you will see the available Wi-Fi networks. Select your network.
e. If your Wi-Fi supports both frequency bands, choose the 5 GHz band.
f. Enter your Wi-Fi password if necessary to establish the connection.
g. Finally, check the network connection to ensure that the PlayStation 5 is successfully connected to the 5 GHz band and is stable.
Pay special attention to the signal strength; if it’s at 100%, everything is good. Otherwise, you should consider using the 2.4 GHz band.
Monitoring Performance on PlayStation 5
After switching to the 5 GHz band, you can monitor the network connection on your PlayStation 5. Check the signal strength and speed to ensure that you are benefiting from the higher bandwidth.
2.4 GHz Wi-Fi:
- Greater Range: The 2.4 GHz band offers a larger range compared to 5 GHz, meaning the signal can penetrate better through walls and obstacles.
- Better Penetration of Obstacles: Due to the lower frequency, the 2.4 GHz band has better penetration through walls and other physical obstacles.
- Less Susceptible to Shadowing Effects: In environments with many objects that could shield signals, the 2.4 GHz band shows better performance.
- Greater Compatibility with Older Devices: Older Wi-Fi devices and some IoT devices prefer the 2.4 GHz band as it is widely supported.
- Limited Bandwidth: The 2.4 GHz band provides limited bandwidth, distributed across a maximum of 14 channels.
- Higher Susceptibility to Interference: Since many other devices, such as microwaves, Bluetooth devices, and baby monitors, use the 2.4 GHz band, it is more susceptible to interference.
5 GHz Wi-Fi:
- Higher Speed: The 5 GHz band offers higher speeds due to a larger available bandwidth compared to 2.4 GHz.
- Less Susceptibility to Interference: Due to wider channel spreading and less usage by other devices, the 5 GHz band is less susceptible to interference.
- Better Performance in Dense Areas: In areas with many Wi-Fi networks, the 5 GHz band can offer better performance as it is less crowded.
- Shorter Range: The 5 GHz band has a shorter range compared to 2.4 GHz, as higher frequencies are more affected by physical obstacles.
- Better Support for Bandwidth-Intensive Applications: The 5 GHz band is better suited for bandwidth-intensive applications like online gaming and video streaming.
- More Available Channels: The 5 GHz band provides more available channels, resulting in a lower probability of interference. The 5 GHz band has a bandwidth of up to 1300 Mbit/s, while the 2.4 GHz band has a bandwidth of only up to 450 Mbit/s.
FritzBox Tutorial
Maximize Speed: How to activate 5 GHz Wi-Fi on your Fritzbox!
Introduction:
In this simple tutorial, we’ll show you how to activate 5 GHz Wi-Fi on your Fritzbox to achieve the maximum speed for your internet connection and devices. Follow these steps to get the most out of your Wi-Fi.
Step 1: Fritzbox Login
Open your web browser and enter Fritz.box or the IP address of your Fritzbox in the address bar (usually „192.168.178.1“).
Log in with your username and password. „The password may be on the back of the FritzBox if applicable.“
Step 2: Navigate to Wi-Fi Settings
Click on „Wi-Fi“ in the left sidebar.
Select „Wireless Channel.“
Step 3: Choose the Frequency Band
Under „Wireless Channel,“ you’ll find the „Wireless Network“ option.
Choose the 5 GHz band here.
Step 4: Activate the 5 GHz Band
Click on „Activate the wireless network (SSID) for the 5 GHz band.“
Confirm the activation.
Step 5: Save Settings
Click on „Apply“ to save your changes.
The Fritzbox will restart to activate the 5 GHz band.
Step 6: Check the Connection
Wait until the Fritzbox has restarted.
Connect your devices to the newly activated 5 GHz Wi-Fi.
Step 7: Monitor Network Speed
Check the network speed of your devices to ensure they are now using the 5 GHz band.